LIGHTNING 5817
This is my first $100 yacht. I heard about this boat that was literally hanging in a guy's garage. It had been there for at least 15 years and the deck had been removed in anticipation of rebuilding. Well, the house got sold and the new owner never got around to working on the boat and sold it to me. I got a new trailer and dragged it home; much to my wife's dismay, (and my kids joy)!
(Wife 2.0 is a much improved version) This was "intended" to be at most, a three (3) year project. Insert laugh here!
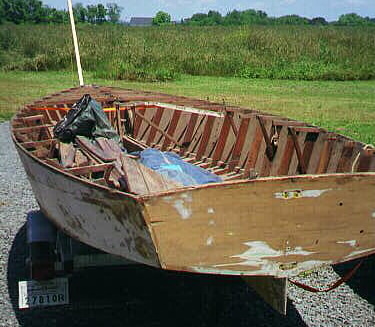
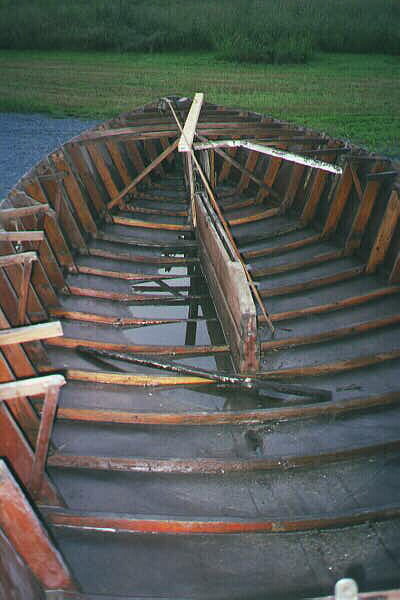
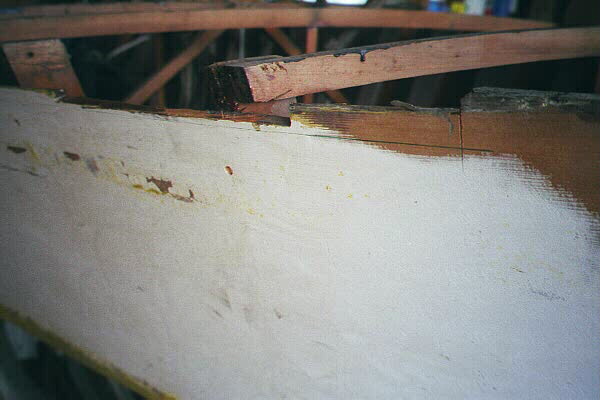
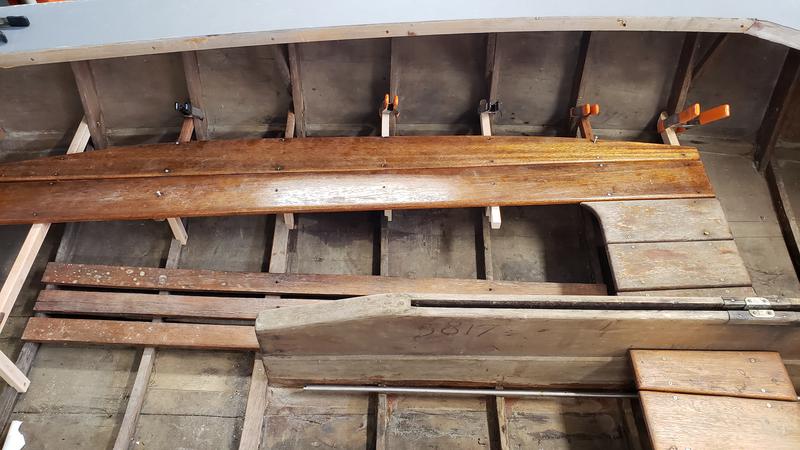
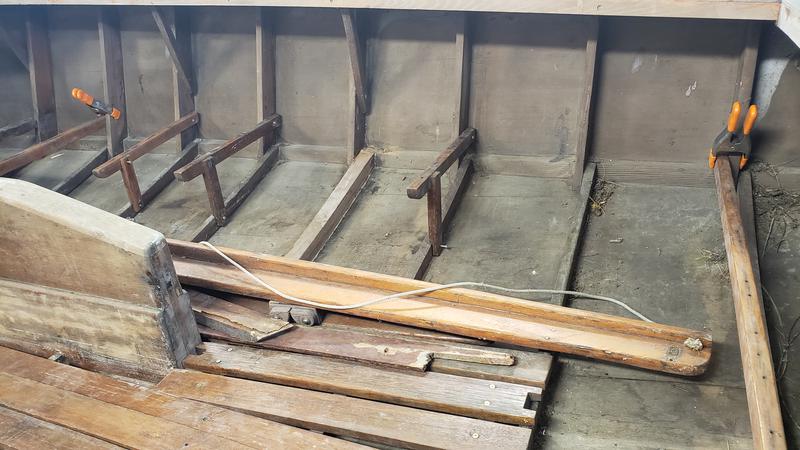
Broken frame here ^ labelled "14"
< Another broken frame here.
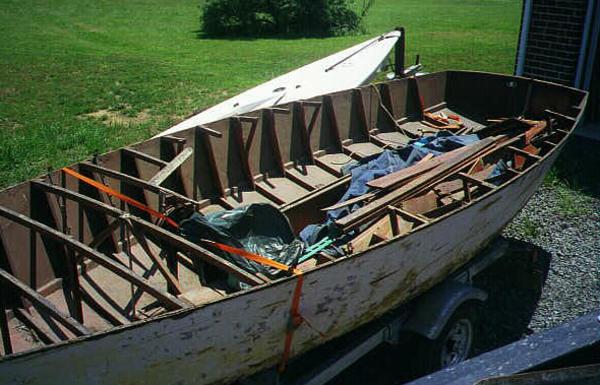
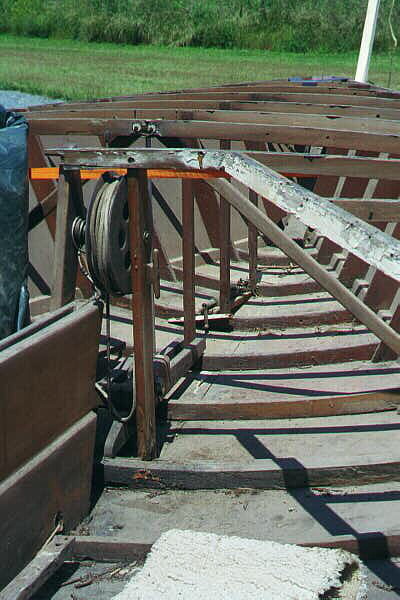
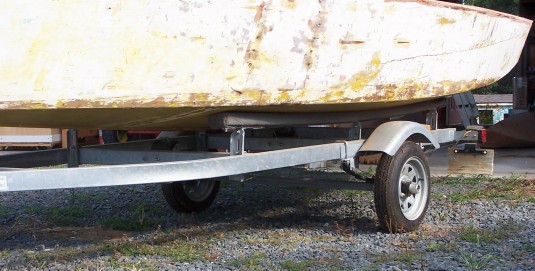
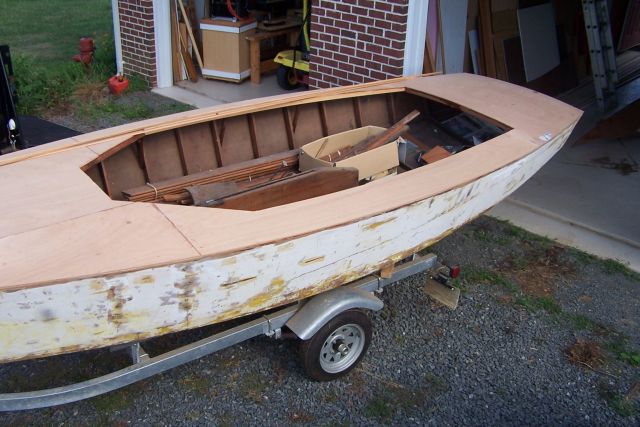
As evident in these photos a lot of work is necessary! First, years of accumulated dirt and grime needs to be washed off, and a survey taken to best determine how to proceed. In the upper left photo all the old decking, fittings, floorboards, and assorted junk are piled in the boat. I kept some of the decking to use as a reference and burned the rest.
On the right the boat has has been emptied, vacuumed, and washed, and is air drying before being moved into the garage for restoration.
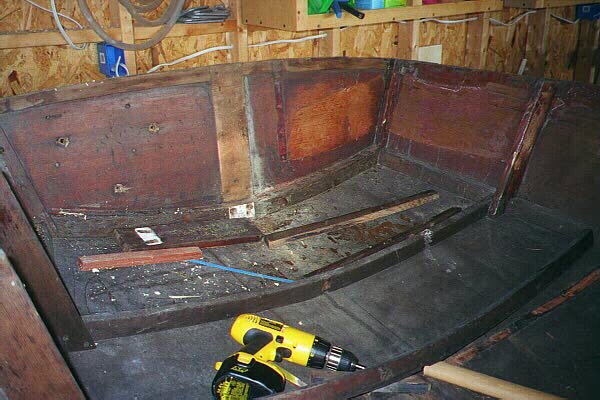
Restoring an old boat, especially a wooden boat is pointless unless one fixes all the problems. Here I have started to remove pieces of bad wood from around the transom. At the right I have removed two frames that were cracked. All of these pieces will be replaced with mahogany instead of the original Spanish cedar. Although the mahogany is somewhat heavier, it is easier to obtain and weight will not be a consideration as this boat could never be competitive.
SUMMER 2000
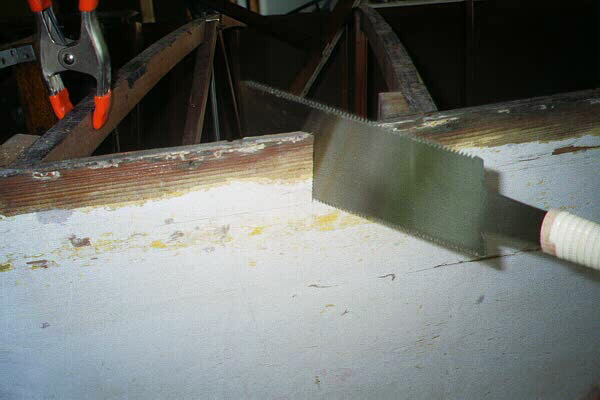
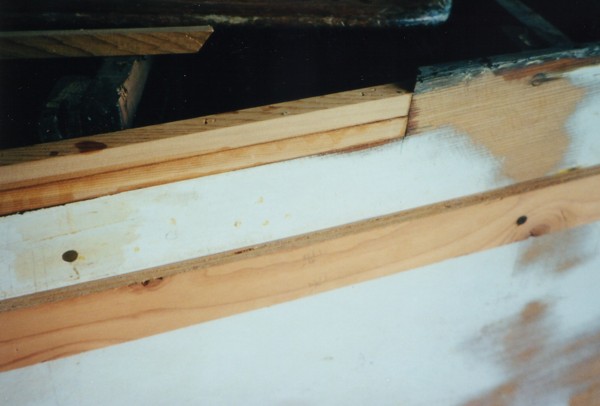
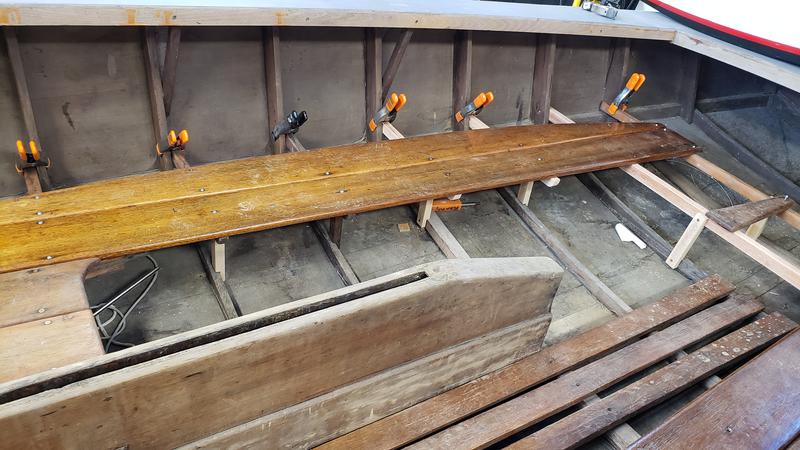
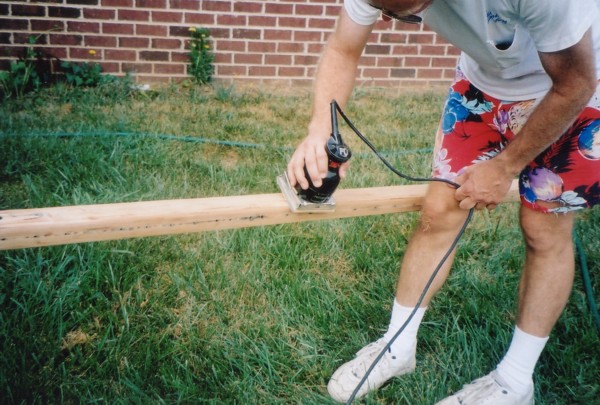
The starboard sheer planking had a nasty gouge, so I cut away the bad wood and glued in some strips of good wood, beveling the ends. You can see where I screwed a cleat on the side of the boat so as to have a true cut when I ran my router down the plank to get a nice straight surface to glue to.
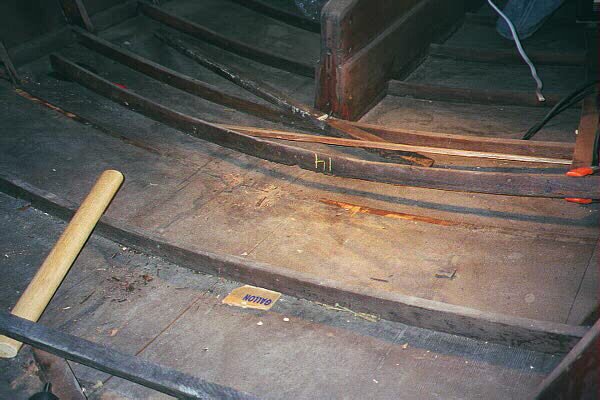
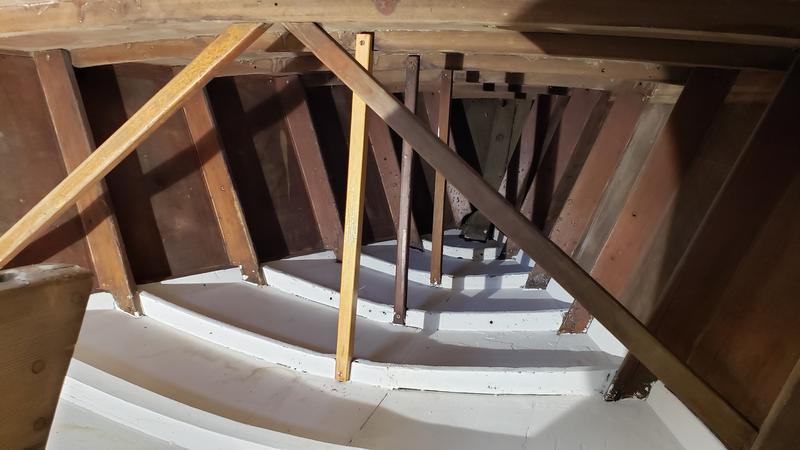
Below you can see there is a crack in the side planking as well as some damage to the bottom and keel areas.
By the time I took the photo on the left I had removed a lot of fasteners to facilitate removal of the cracked frames I found. I'm not sure I would have bought the boat if I had known how much unseen damage there was but, in for a penny...
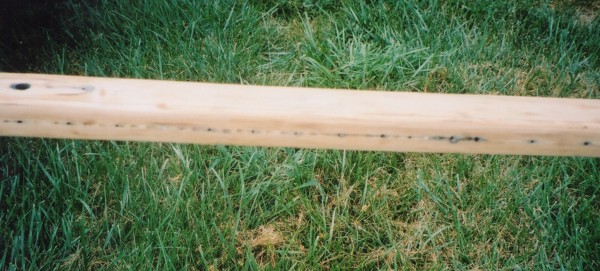
The boom was rotted and cracked (left) and the mast was filthy, with most of the varnish long gone, and the wood somewhat raised. I STILL have the boom so I can replicate it in Douglas Fir. The mast I cleaned, sanded to bare wood, and put at least 6 coats of varnish on and have had it hanging up in either a basement or garage of 3 different houses!
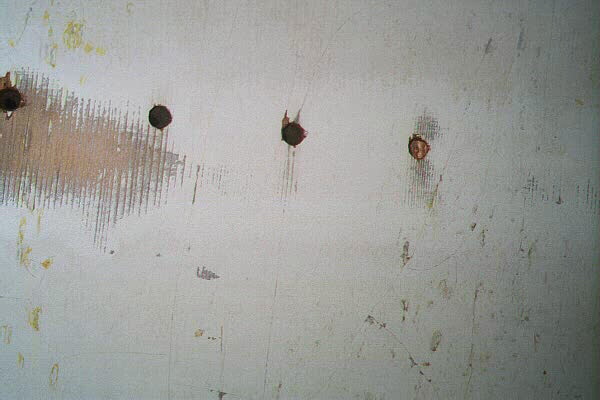
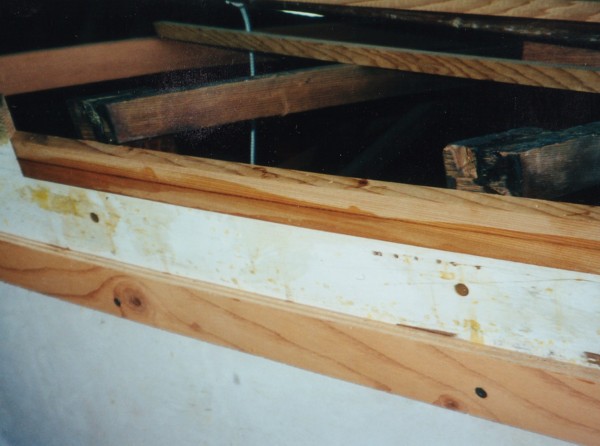
Right: The machine screws for the shroud chainplates had enlarged the holes in the side planking. I gave them the Gougeon Bros, WEST system treatment by drilling out half of the holes oversized and filling with thickened epoxy. I then re-installed the chainplates and used them to drill the new hole in the proper location. I repeated the process for the remaining holes. The anulus of epoxy will prevent rot and give a better bearing surface for the machine screws.
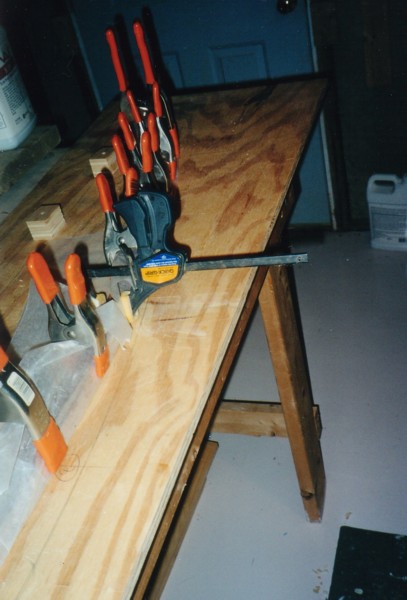
Left: Meanwhile, I had made up a jig to laminate the replacement frames. I estimated the amount of "springback" (fairly accurately) and screwed clamping blocks to a piece of plywood. Ripped pieces of mahogany and planed them to about 1/4" and glued them up with epoxy. I also did the same with a couple of deck beams. After letting the epoxy fully cure, I dressed them up with the belt sander and checked to see how closely they fit. I did have to "tweak" the jig a bit, but not much.
A little research found this was a Lippincott built Lightning from 1955!
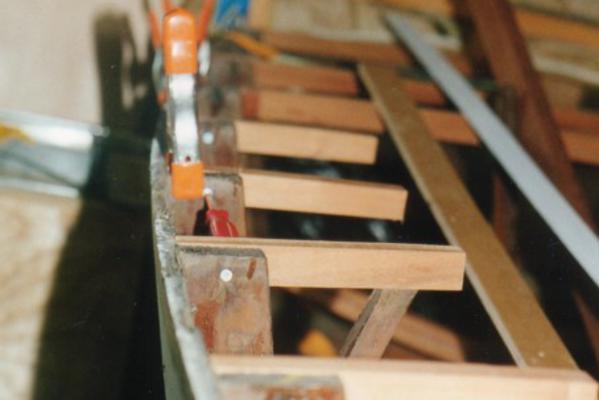

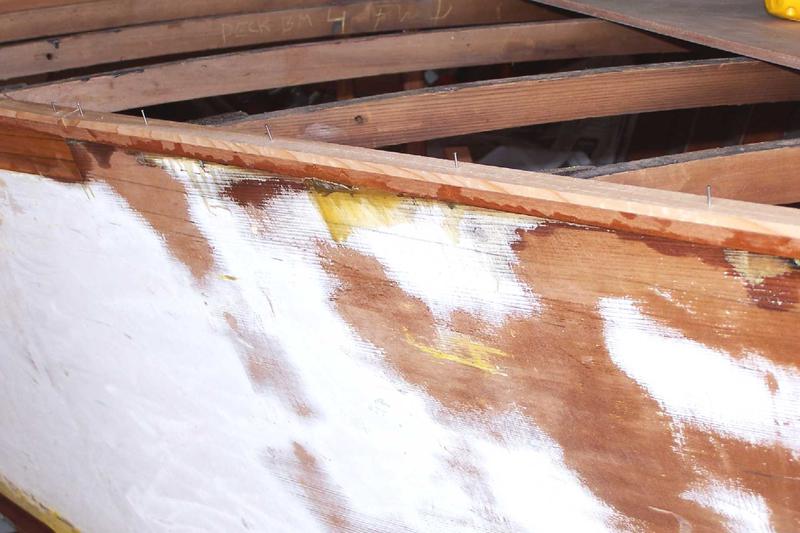
Above and Left, these three pics show the deck beams that were replaced and a bit of side planking repair.
By now it's 2004 and several different family issues have kept me from making more progress. Little did I know how much slower this project was going to become!
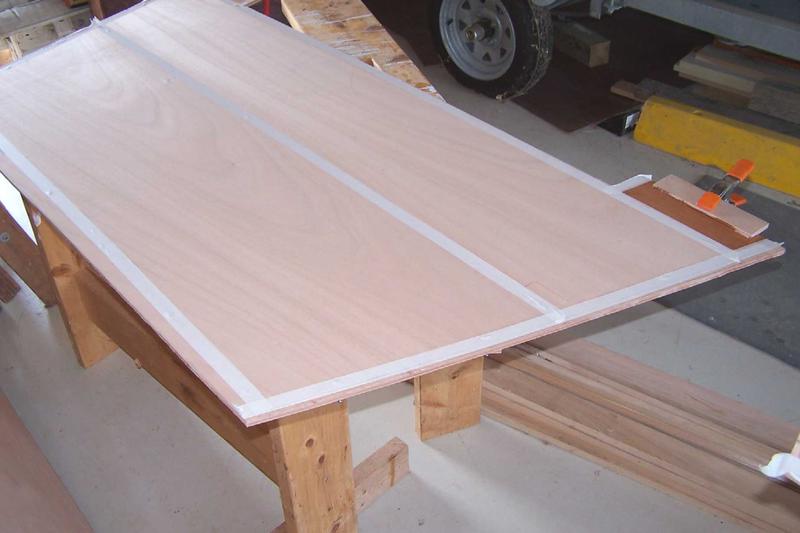
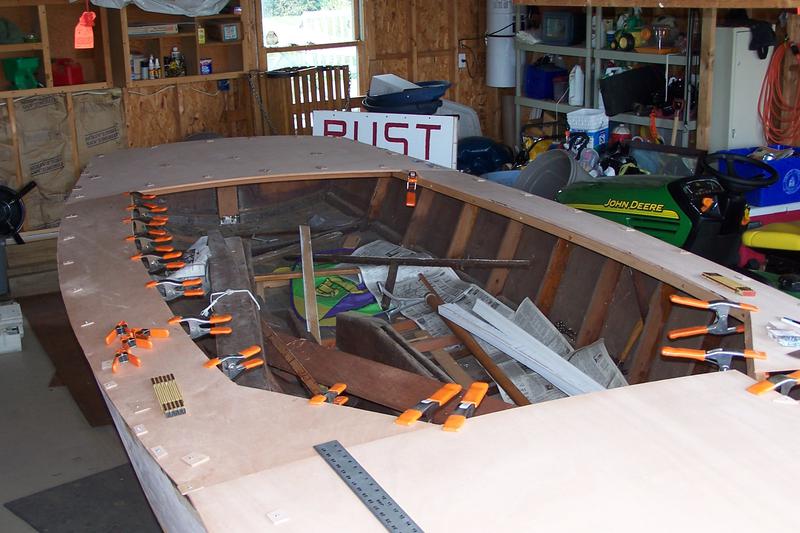
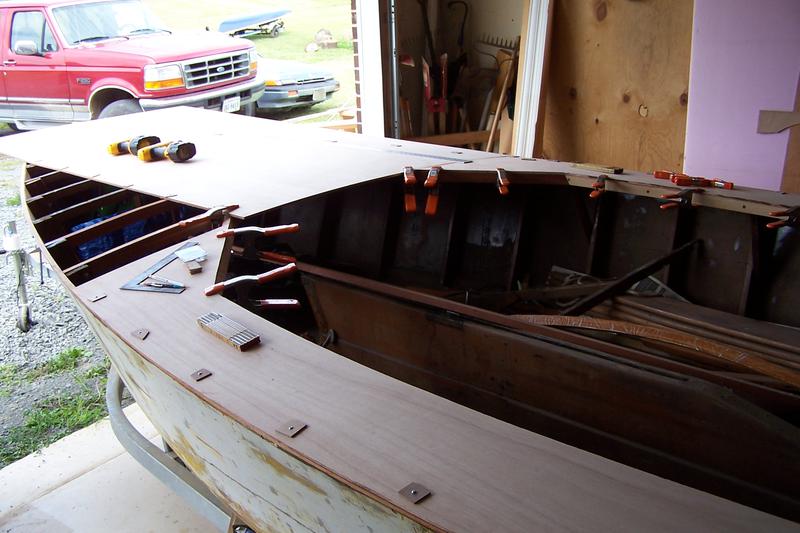
But first I purchased several sheets of 3/8" marine plywood and fitted them to the deck beams.
Not much progress the past few years as I've become a single Dad. It's going to get even slower as I get more into racing big boats and dating my future Wife 2.0.
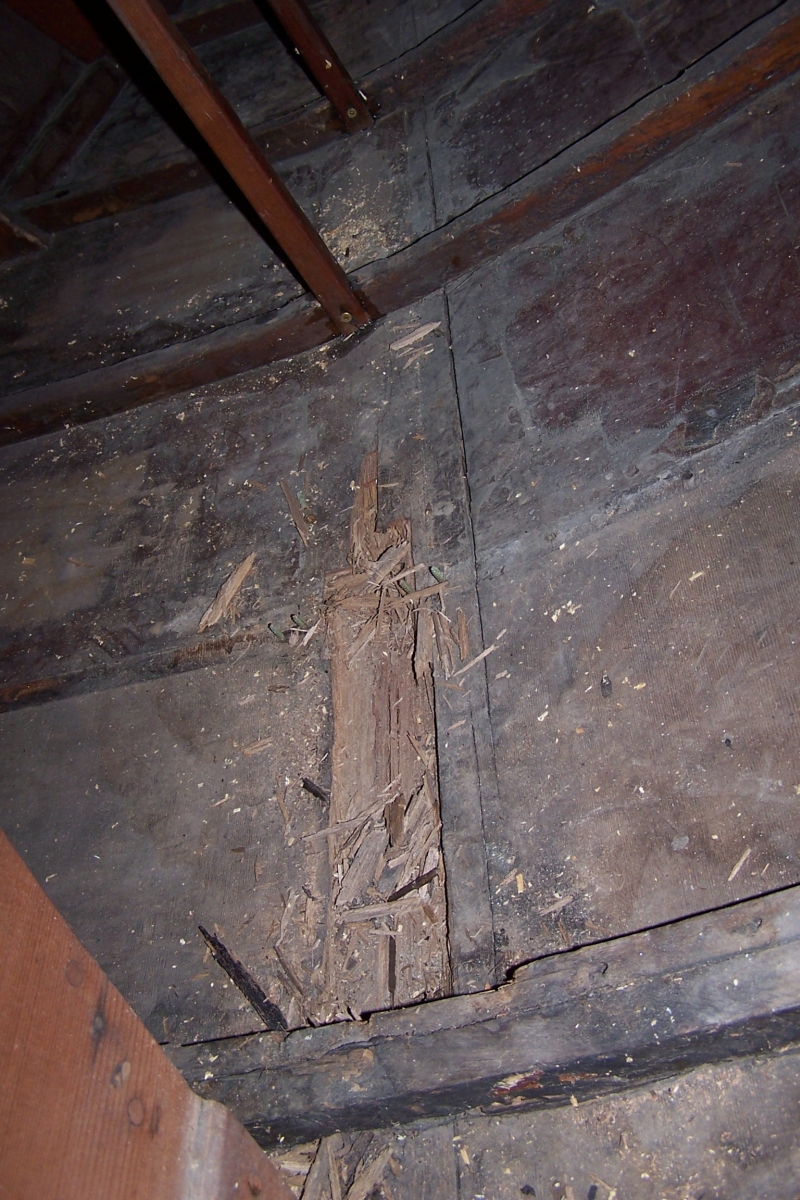
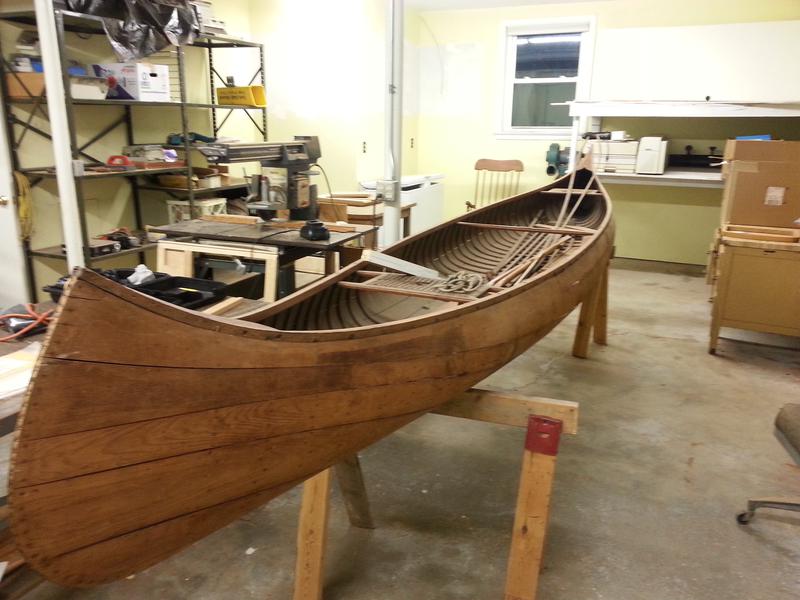
Fast forward to 2013/14. Then I discovered ROT under the mast step. It extends into the inner keel and under the centerboard trunk. Crap. This was not something I felt capable of dealing with at the time. Fortunately sometime back, Bob Astrove had told me about Corky Gray in NC. Coincidentally, around this time my In-Laws were moving out of their house of 50 years and had a very old Morris canoe that had been damaged and he had never gotten around to fixing it. I convinced him to have Corky repair the canoe at the same time I was going to have Corky deal with the rot issue under the Centerboard. Turned out to be a good thing. It's the oldest known Morris canoe in existence, circa 1894!
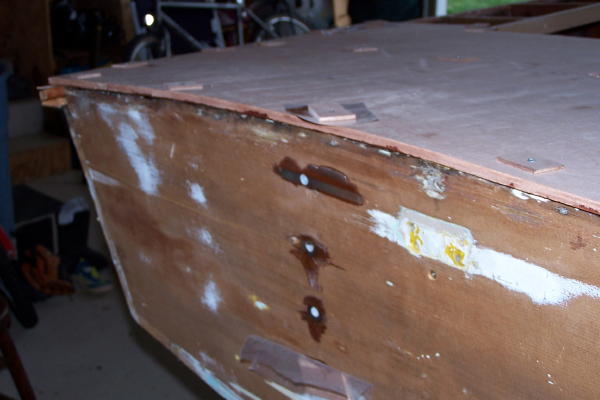
At left is a view of the transom that has had the screw holes for the stern log filled and several places where thickened epoxy was used to fair torn out pieces of the transom. I suspect that at some point glass was laid on the boat using polyester resin. Polyester adheres to wood with various degrees of adhesion; sometimes tenaciously, sometimes barely at all. I think some glass was peeled off and took some of the wood with it.
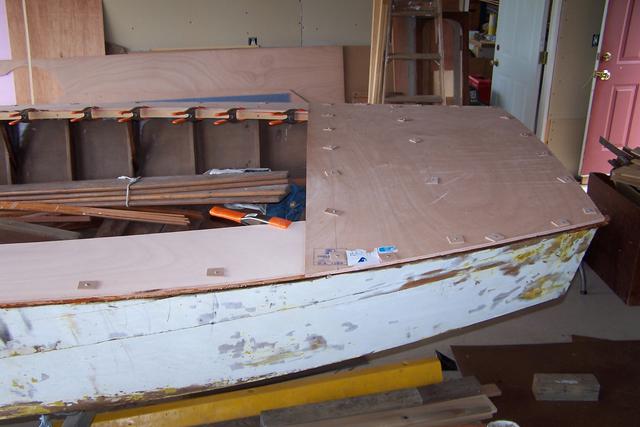
At left and below left you can see the plywood decking being epoxied in place and some of the epoxy oozing out.
Finally, below right is a shot of the finished decking.
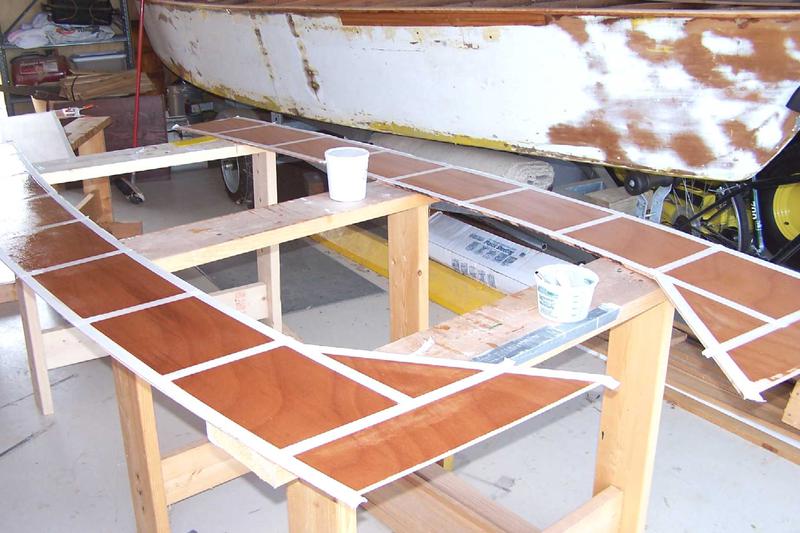
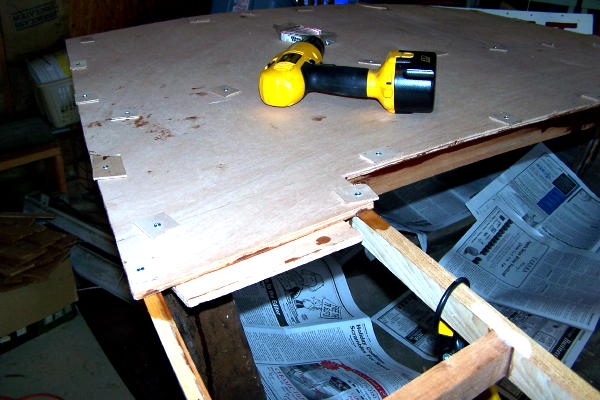
I laid them out and temporarily screwed them in place. You can see in the pictures to the left and above how I used small scraps of plywood as "washers" to prevent denting of the plywood. I then got inside the boat and marked where the panels contacted the deck beams. This allowed me to epoxy coat the underside of the deck panels, but leave bare wood where they would later be epoxied to the deck beams. The lower left picture shows how I taped off the area I wanted to protect, and the lower right photo shows two of the panels after they had been coated with epoxy.
This is September 2004. I don't remember when exactly it was, but I laid Dynel glass over the deck saturated with epoxy and filled the weave with additional coats of epoxy.
I don't have pics, but in 2016 my wife and I glassed the hull. Several years earlier I had taken two pieces of 3/4" plywood and cut out the shape of the hull forward of the mast step and about the aft end of the cockpit an rounded the corners of the plywood. This basically created two "wheels" with which I could roll the boat over with just one or two other people assisting. I really wish I had pictures of this to demo. Alas, I don't.
Then in 2017 we sold the house in preparation for my retirement and moved to a rental while we looked for a house or land to build on. The fall of 2017 I sanded, filled and primed the deck, turned the boat over and did the same to the hull. We found a lot, picked an architect, and started designing a house. Then, out of the blue came an opportunity to go sail half way around the world on OPB; other people's boats! So, I covered the boat in the upside down position and we left for NZ. Ten months later we came home from Cape Town S. Africa. THAT story is told HERE.
2019 and 2020 were spent finishing the design of the house and building it along with the shop that I built (with the help of wife 2.0)!
A few months ago I had made enough progress on other things and moved the Lightning into the shop and started rebuilding the interior. Seats, supports, centerboard drum, etc.
The classic-Lightning site was a HUGE help as I spent several hours pouring over pics to see exactly how a Lippincott Lightning looked.
I sourced some Spanish Cedar and figured out what all the pile of pieces I had were and how they went together to form the supports for the seats. Lippincott actually wrote on the pieces where the pieces went! S4 or P2, etc. I figured out they were numbering from aft to forward. It ended up I only had to make a few pieces. I did find that some of the pieces I had just didn't line up or weren't really usable. you can see that for the aft cockpit seats I used the old cross cockpit beam in the rear and then made a new one for the forward cross cockpit beam. Pictures "A" and "B" show the cockpit in dry assembly mode.
I dismantled everything, Iightly sanded the entire inside, vacuumed and cleaned it, then painted two coats of some latex paint leftover from building our house.
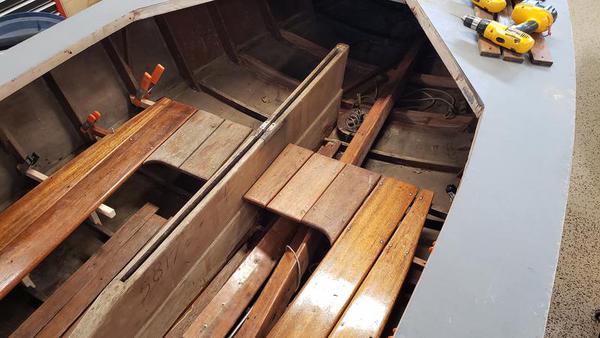
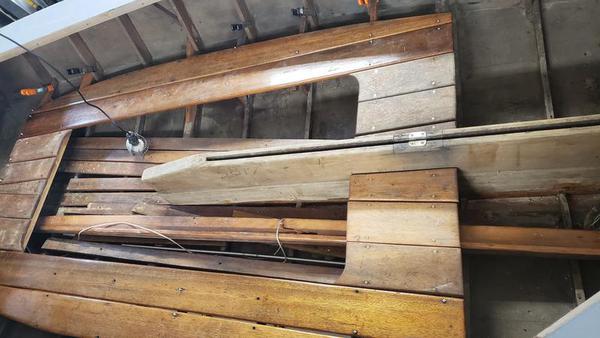
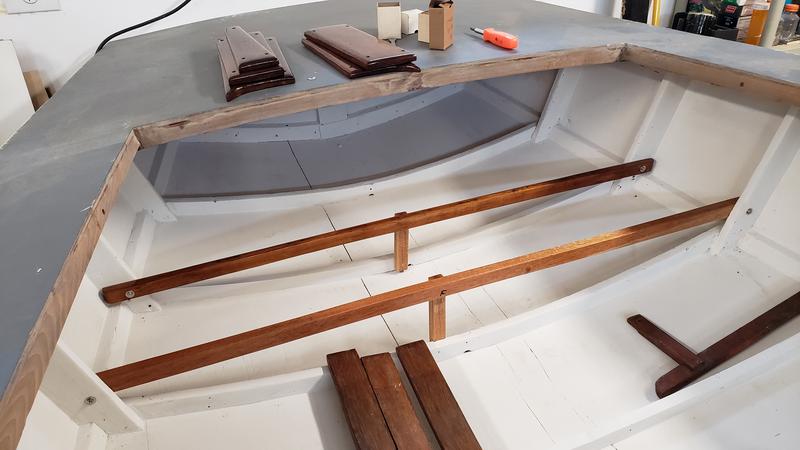
A
B
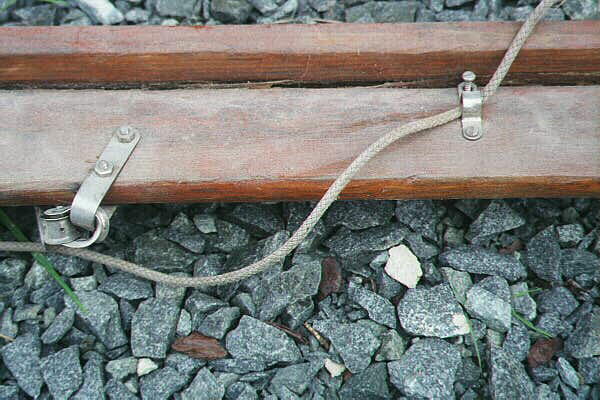
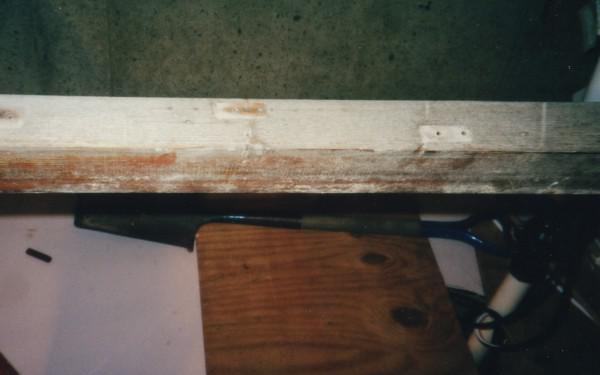
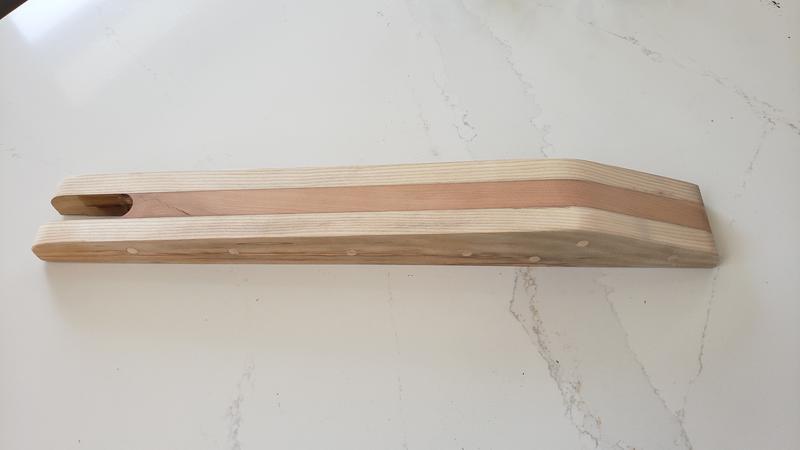
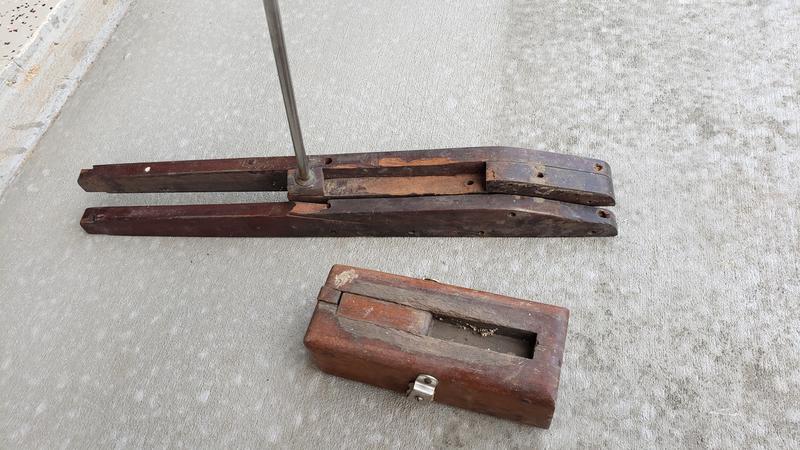
Below we have the mast step. The one on the left is the original which was obviously falling apart. The block portion had a tongue that fit down in the slot of the actual step. One of the two deck tiedown rods is still in the step.
On the right is the new step I laminated out of ash and cherry I had on hand. The bungs visible are from where I screwed the pieces together while laminating. After it was dry, I rough cut to shape, belt sanded it and then used a Forstner bit to drill out the curve in the middle to reduce stress concentrations. I really don't think it was necessary, but it just makes it look a little more finished.
Next I'll address the lifting mechanism for the centerboard; I'm not sure if I want to re-use the phenolic drum or go to a block and tackle purchase system. I've tried to use the existing material whenever possible so that may influence my decision.
After that I need to get some mahogany to make new floorboards as some of them are rotted and I also need to make the coamings and splashboards. That's next on the list.
I rather doubt much progress will be made in the next 3 months as I am getting ready to race my big boat (Bermuda1-2) and there are a few house projects that need to be built; outdoor shower, pivot door for my office...
In the fall of 2014 my wife and I drove the Lightning with the canoe stuffed inside and sticking out the back, down to Corky Gray's home in NC. He was wow'ed by the canoe and said it was worth restoring, not just patching the hole in the side. My F-i-L agreed and poney'd up the $$.
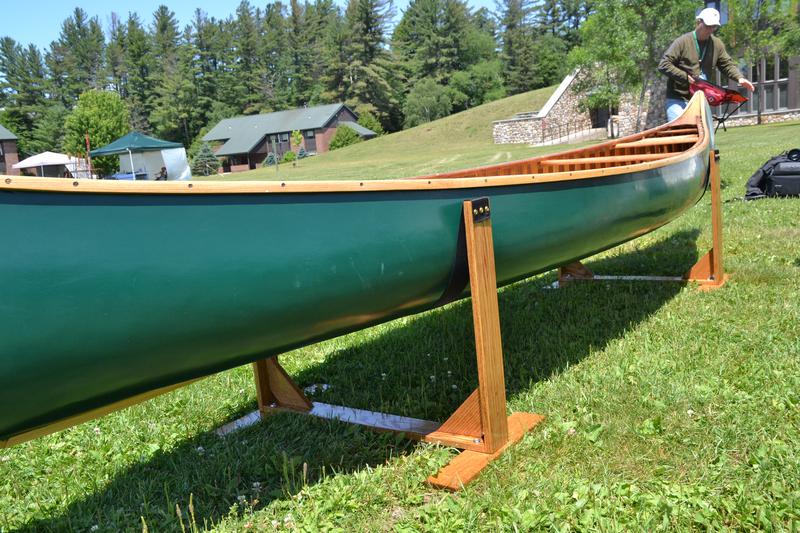
The following June 2015, my wife and her Dad drove back down to pick up both boats, and later in the summer went to upstate NY for a canoe symposium that was featuring MORRIS canoes that year!

Here is a link to Corky's page which shows how he repaired the keel and put the centerboard trunk back in as well as another link showing how he repaired my Father in Law's canoe.
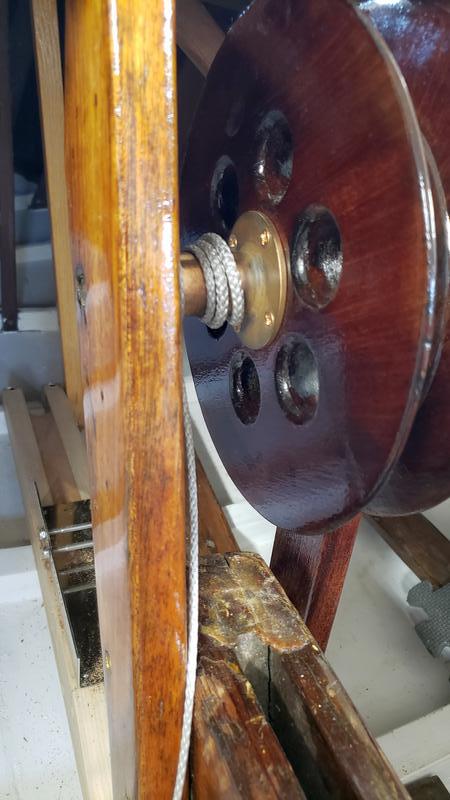
The original system for lifting the centerboard used this wheel and drum method, creating a winch that pulled the centerboard up and forward. The wooden wheel was in good shape, so I wiped it down with alcohol to clean it, and found that the finish was gumming up. Must have been shellac or some other finish that alcohol would dissolve.
So I got the heat gun out and scraped off most of the finish and then cleaned it up with some paint stripper. Three coats of varnish later... it looks brand new.
I also took the brass drum off, touched it up on the brass wire wheel and replaced the wire cable with a piece of Amsteel that I had spliced an eye into each end.
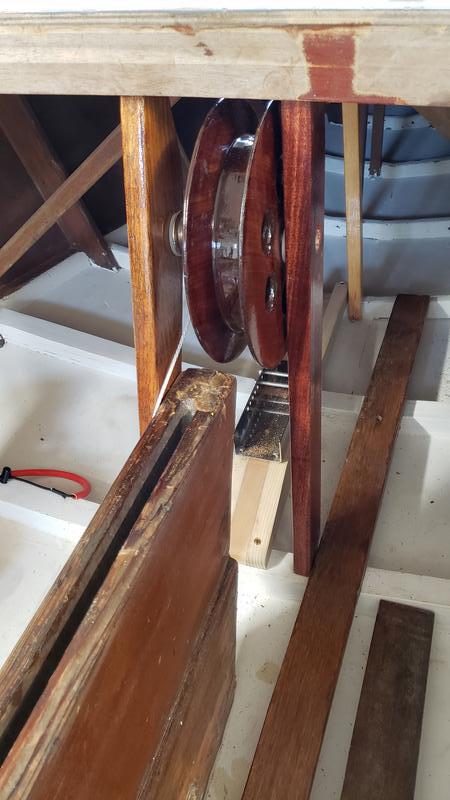
The original support on the port side of the centerboard trunk was still good, so I installed that and used a piece of old growth mahogany to fashion a replacement piece for the starboard support as the old piece had rotted.
I'll finish it off by putting a brass cover plate on either side to cover up where the axle passes through the supports.
This is the progress as of May 2021. I'm going to take a break in preparation for some serious sailboat racing as well as a few other projects I have to finish this summer.