Just what everybody needs; a canoe in their living room. I mean really, how many people use their living rooms for anything but a place to put stuff?
Building a Strip Canoe
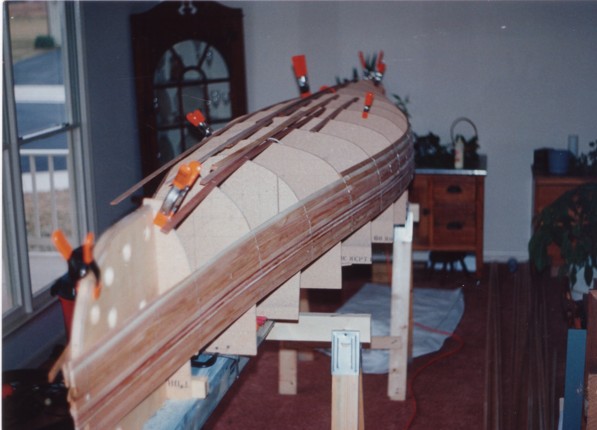
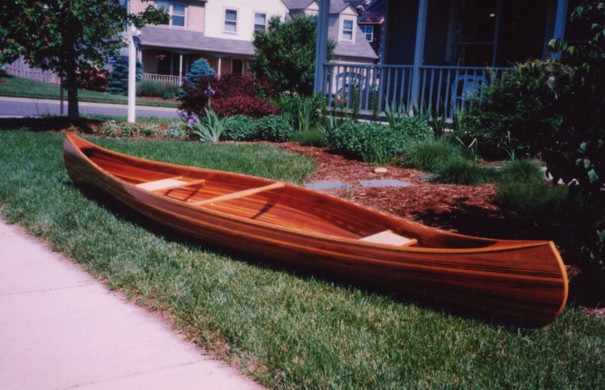
This canoe is a 15'6" version of Ted Moore's Hiawatha Design. I spaced out the middle sections a bit to stretch the boat 6". I built a strongback out of metal studs and U channel and screwed the 3/8" particle board molds to crosspieces on the strongback.
The whole thing was levelled on sawhorses which were then nailed through the carpet (!) into the subfloor to prevent movement. Cedar boards were ripped and bead and cove edges routed on each piece. The canoe was stripped in about two months, working when I felt like it and taking my time to get it right. Only occasionally did I get frustrated and tear off old work I was dissatisfied with.
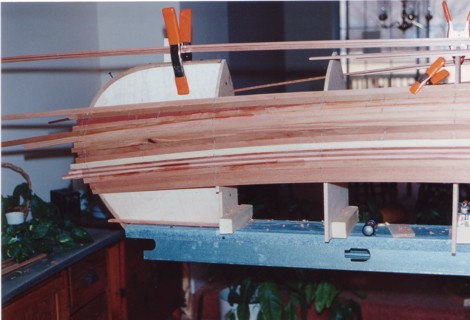
I started planking at the sheer line and worked my way up (down the finished boat) doing a couple of strips at a time on each side. This prevents the boat from developing a twist. At the right you can see the strongback, as well as the stem form with a small inner stem bent around the form. Each strip was glued to the previous strip w/ regular yellow wood glue and stapled to the form until it was dry. (Wood glue was easy to use and clean up; since the boat was getting an epoxy/fiberglass covering I wasn't worried about it's lack of water resistance.)
Next the planked hull was carried out to the garage. Before commencing building I had measured the exits in the house and determined that it would be impossible to take the boat out through a door without tilting the boat/mold combination. I feared this would crack the planking so I planned to take the boat out through the living room window. As planned it fit with 1" to spare! From then it was a short trip to the garage which was now warming up with the approach of spring and I began sanding and fairing the hull.
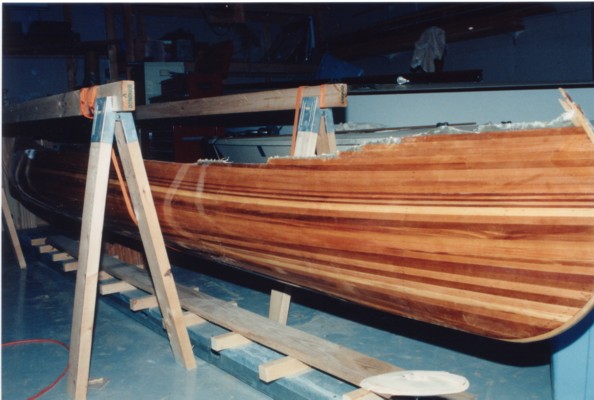
Next the inside of the canoe was sanded, a reinforcing interior keel of ash added and then we fiberglassed again! Outer stems were laminated on, ash inwales and outwales glued into place and cherry decks added fore and aft. Instead of hanging the seats I glued cleats on the sides and screwed the seats into the cleats. An ash thwart was shaped and installed, but in hindsight I would use a regular canoe yoke next time. Finished weight was just about 43lbs.
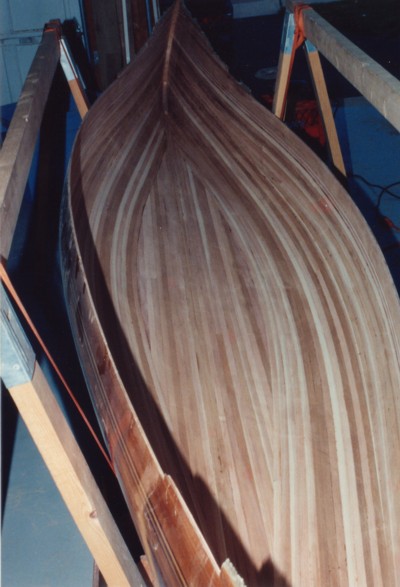
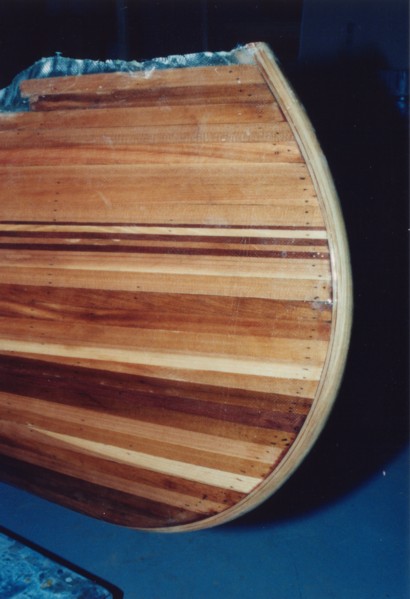
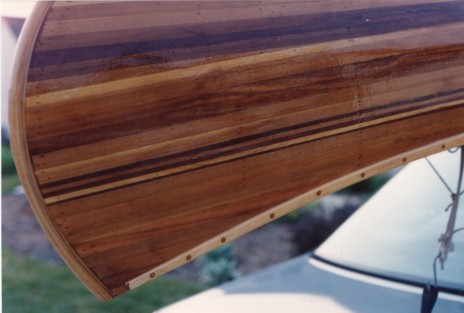
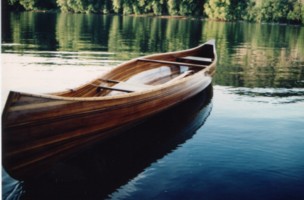
At right a close up of the finished product. The accent strip was built up from cedar and redwood, stacked and then sawn vertically and sanded. Notice the dark colored "bungs" on the ash outwale. These really are the end grain from regular hardwood dowels that I used to fasten the inwales and outwales to the boat. No metal fasteners were permanently used in the construction of the boat; just wood and epoxy.
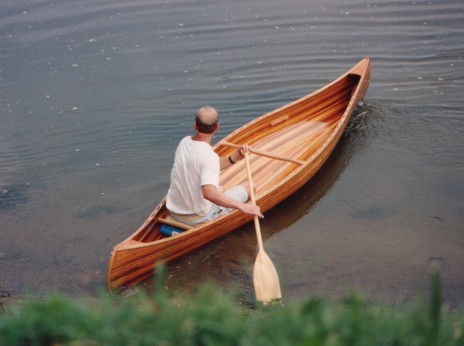
At left the grand launching. A very tender boat for those used to big plastic tripping canoes, but once you get used to it no problem! Sitting in the stern with it's fine lines I could heel the boat to one side and still keep it tracking straight while paddling on one side only. I could even make it turn to the side I was paddling on just by leaning and shifting my weight. If the wind picked up the bow would act as a sail and turn me off course so I would move to the center thwart, kneel and paddle there. While not suited for white water because of it's construction, I did venture through some Class 1 riffles and even some that bordered on Class 2. I paddled the boat for about 5 years and then sold it through a marine consignment shop and bought a bandsaw with the proceeds.
My wife then helped me (again!) with the fiberglassing and brushing out the drips in the epoxy. At left, the finished product from 'glassing the exterior. Below left, the molds have been removed and the boat turned right side up.